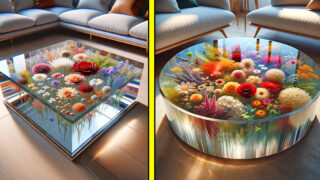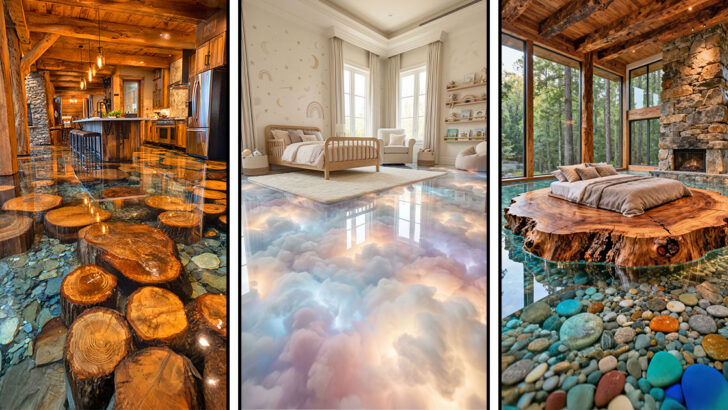
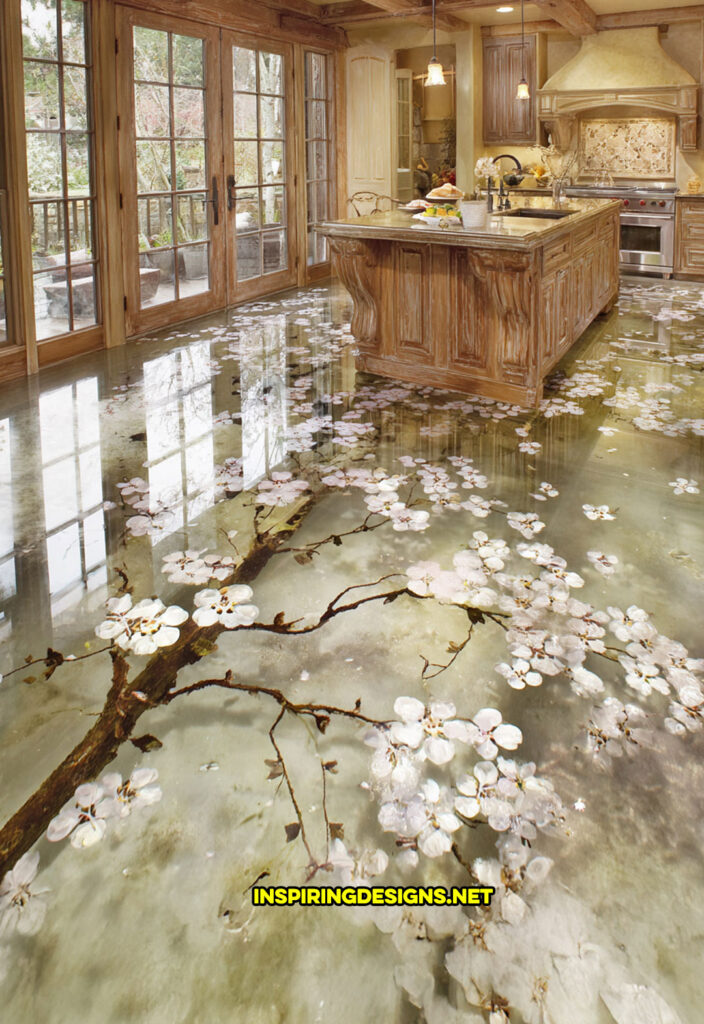
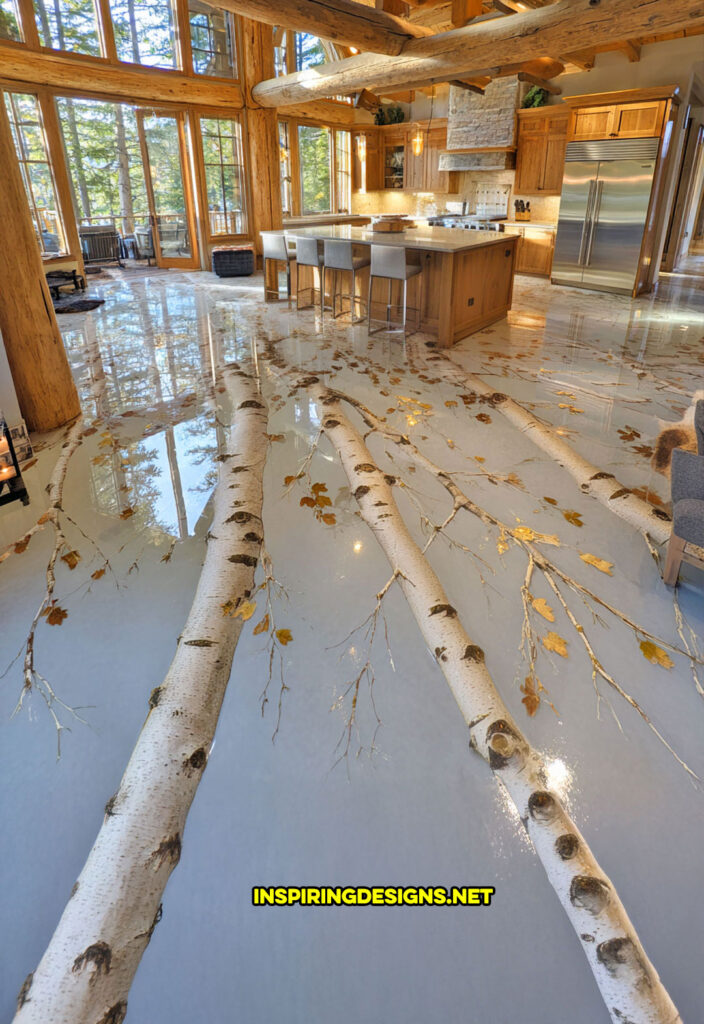
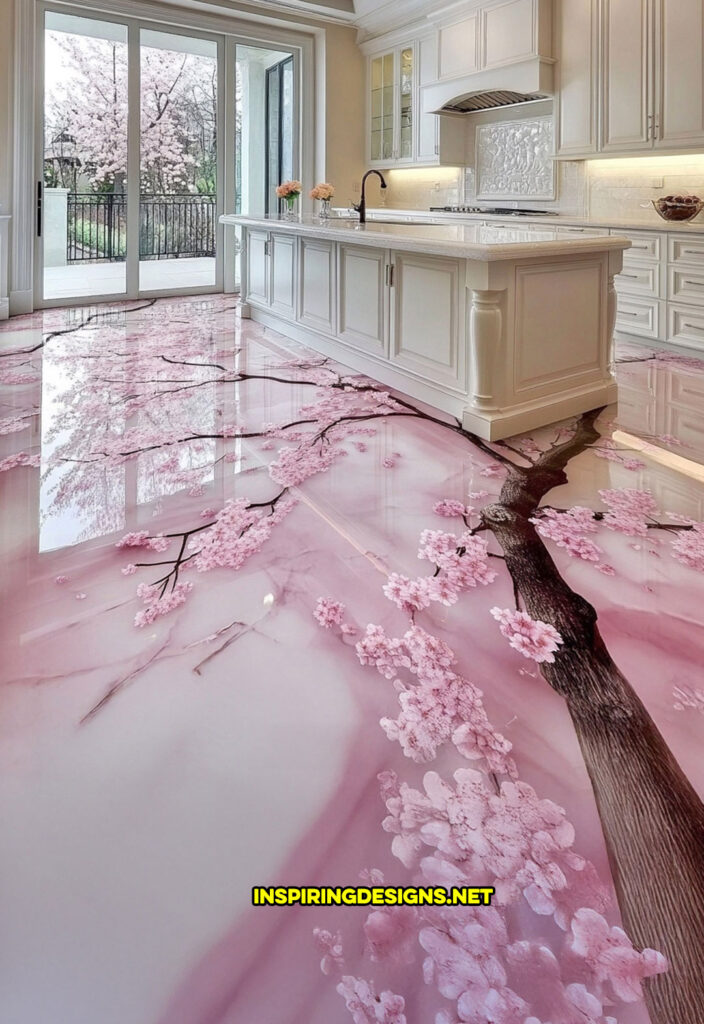
Epoxy floors are not just shiny hard surfaces anymore. In the right hands they turn into immersive scenes beneath your feet: river stones under glass clear water, soft clouds curling around a bed, autumn leaves preserved in perfect detail, even a favorite jersey collection floating under a mirror smooth finish. Instead of being a background material, the floor becomes the calm, luminous centerpiece of the room.
How these floors actually work
At the heart of this approach is epoxy flooring, a resin system poured as a liquid that cures into a solid, seamless surface. What makes the more artistic versions different is layering. Rather than rolling on a single coat with some color, the installer builds several transparent layers, sometimes eight to twenty five millimeters thick in total. Between those layers sit real stones, sealed wood slices, dried leaves, sand, pigments, or hand painted scenes.
Because everything is encapsulated under clear resin, the eye reads depth instead of surface. Step to one side and that cluster of pebbles seems to move. Look across the room and reflections double the effect. That is why a living room with a shallow “water” floor or a bedroom sitting over a faux riverbed feels larger and calmer than its square footage would suggest.
Under all that artistry, the structure is pragmatic. The subfloor is ground, leveled, and sealed. A primer binds the first coat. Each layer of resin cures before the next one is poured, which controls bubbles and keeps the embedded elements exactly where they belong. The final coat is a high gloss finish that resists scratching and enhances depth, or a slightly softer sheen if the design calls for it.
A quick snapshot of the build:
- Typical thickness for scenic floors: 8 to 25 mm
- Compatible substrates: concrete, properly stiffened wood, some tile after prep
- Heat friendly: works well with radiant floor systems
- Ideal use: residential feature rooms, suites, kitchens, studios, galleries
The end result is a luxury epoxy flooring system that behaves like architecture, not just decoration.
Planning, cost and the practical bits
The romantic part is the design. The grown-up part is the numbers and the schedule. Both matter.
Most custom projects land in this range:
| Project Level | Description | Approx. Cost per sq ft* |
|---|---|---|
| Signature | Simple scene, subtle depth, minimal embedding | 75–110 |
| Immersive | Multiple layers, natural materials, stronger 3D effect | 110–150 |
| Showpiece | Complex compositions, heavy embedding, detailed artwork | 150+ |
*Prices vary by region, access, subfloor condition, and design complexity, but this table gives a realistic ballpark.

What affects the final number:
- Complexity of the scene and how much hand placement it needs
- Number of pours and total thickness
- Subfloor repairs, leveling, or moisture mitigation
- Room shape, stairs, and transitions to other materials
- Choice of pigments and metallic accents, especially UV stable options
- Site logistics in high rises or tight spaces
Time is the other big planning piece. A typical sequence looks like this:
- Design consultation, sketches, and samples: 1 to 3 weeks
- Surface prep and subfloor sealing: 1 to 3 days
- Layering and resin pours: 2 to 5 days
- Light foot traffic: usually after 24 to 48 hours
- Full cure for furniture and rugs: generally 3 to 7 days

If you like to schedule everything, the sweet spot is installing after cabinets and major millwork are in, but before baseboards and final painting. That keeps the edges clean and reduces masking.
Design ideas room by room
The fun really starts once the logistics are clear. Because the surface is cast in place, each floor can respond to the view, the light, and the architecture around it.
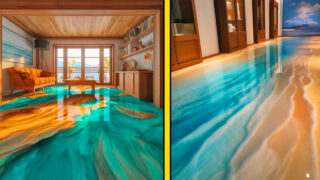
Living rooms
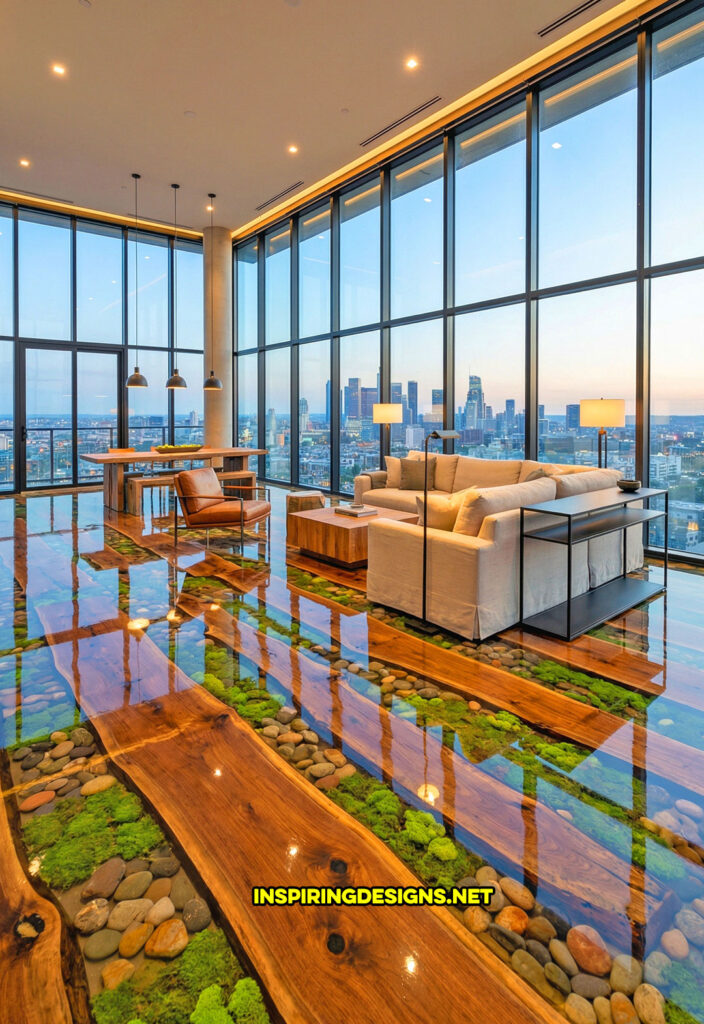
These spaces reward depth more than any other area. Large windows, tall ceilings, and open sightlines let a scenic floor breathe. A few popular directions:
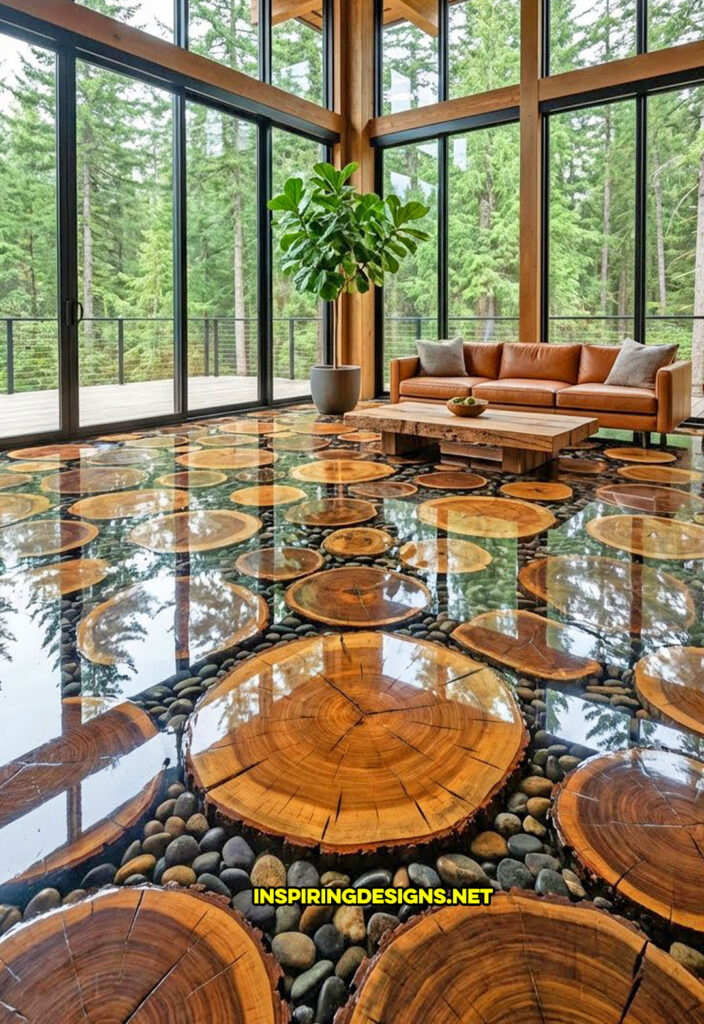
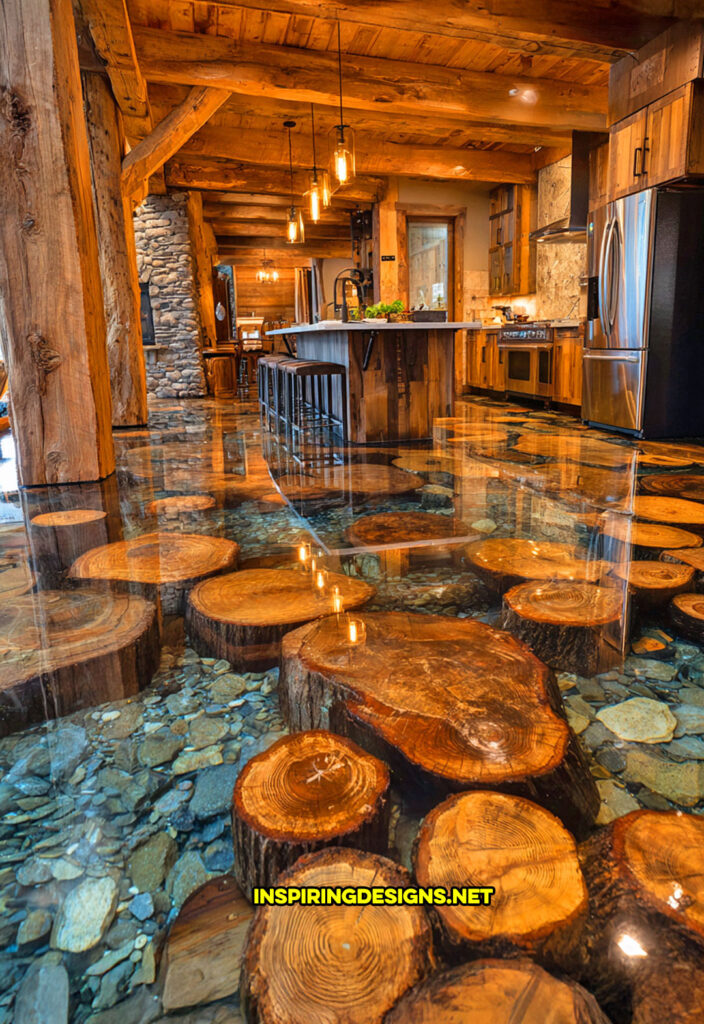
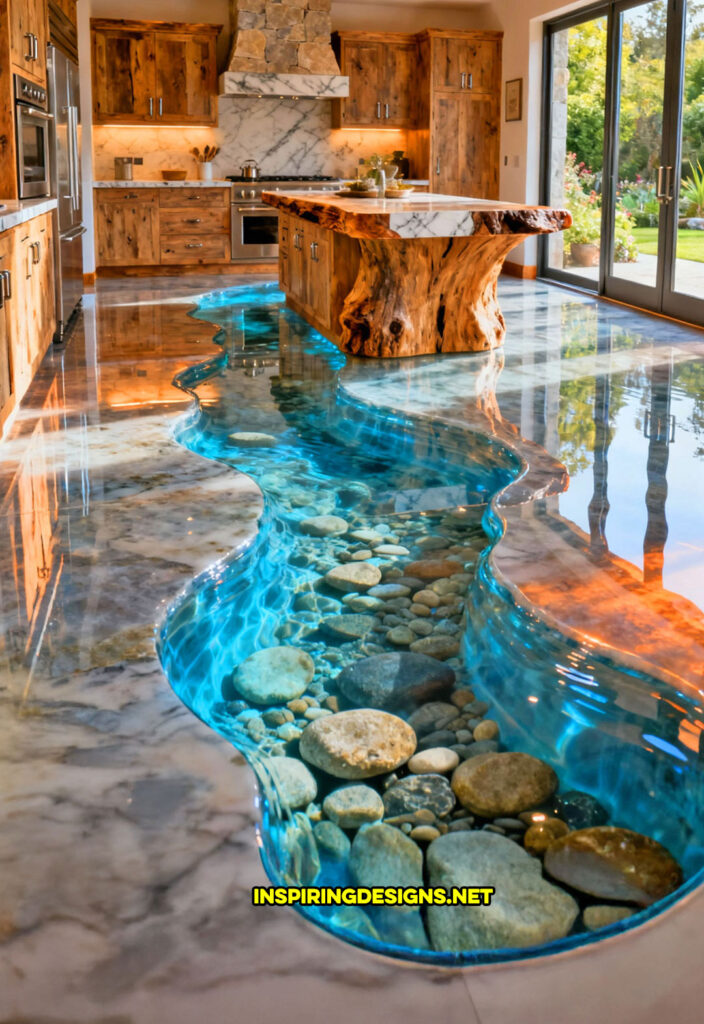
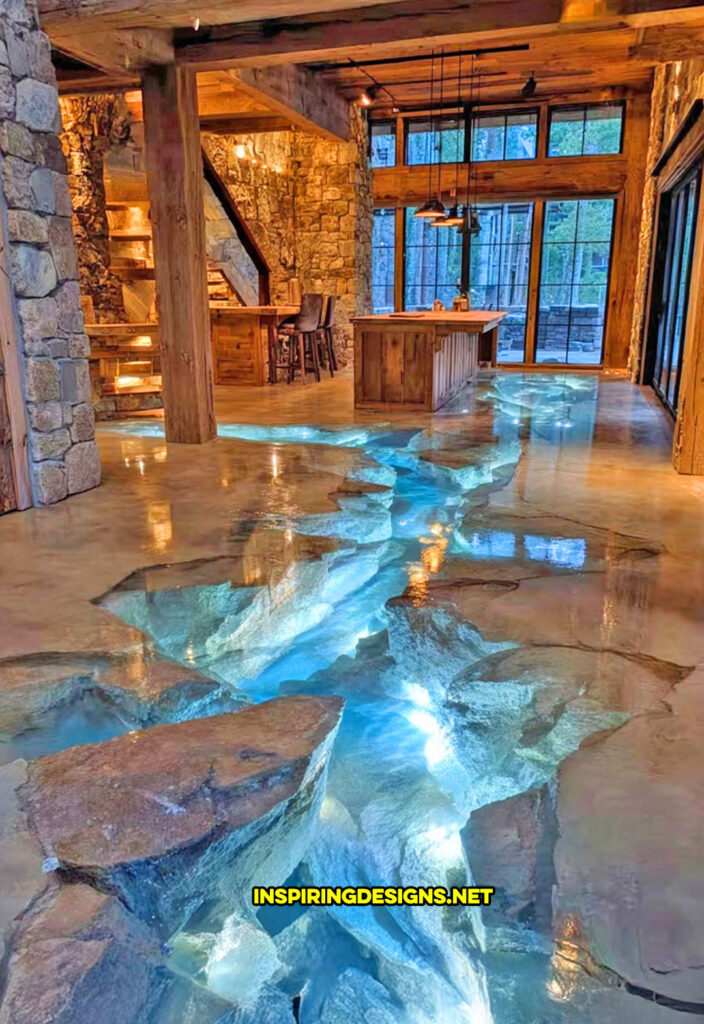
- A shallow, stone lined “stream” running under a coffee table
- Warm wood slices floating in clear resin to echo heavy timbers overhead
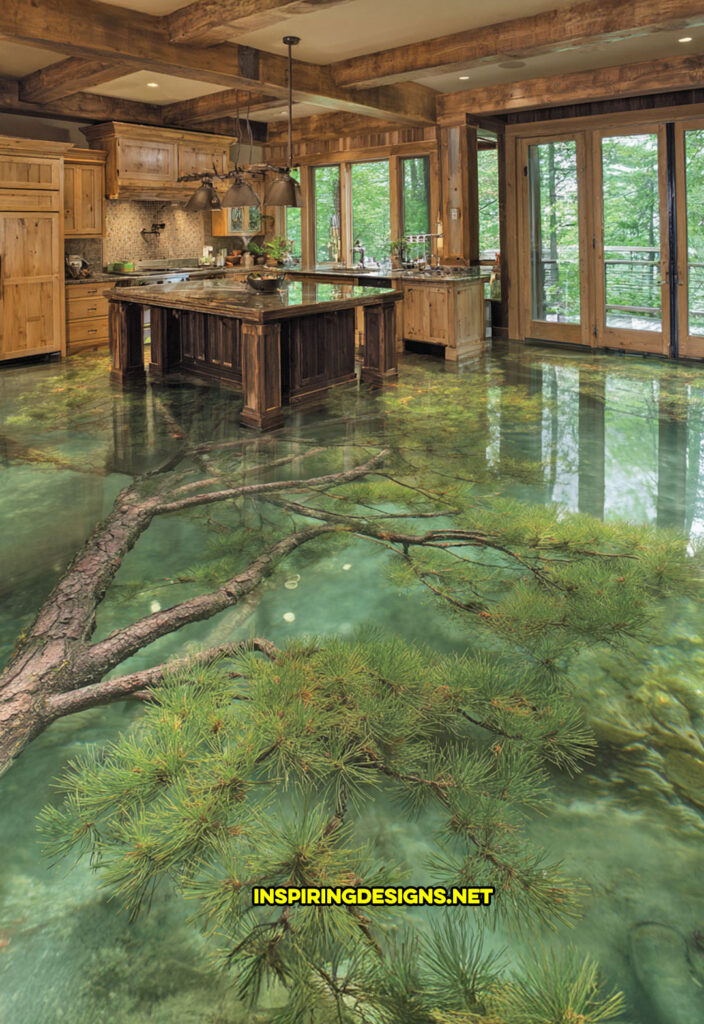
- Forest inspired layouts with mossy greens and river rocks underfoot
Even modest rooms feel wider when a high gloss surface stretches from wall to wall without seams. Reflections extend the space and soften transitions between seating areas.
Bedrooms
In most homes, bedrooms play it safe with carpet or plain planks. Replacing that with a calm resin surface can completely reset the mood. Imagine:
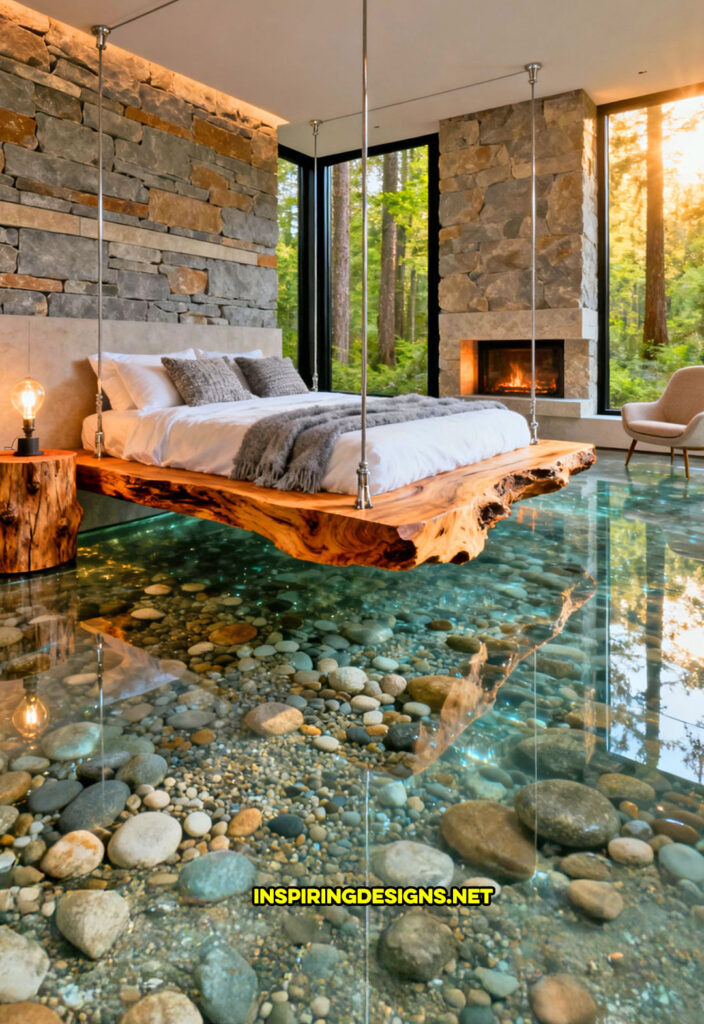
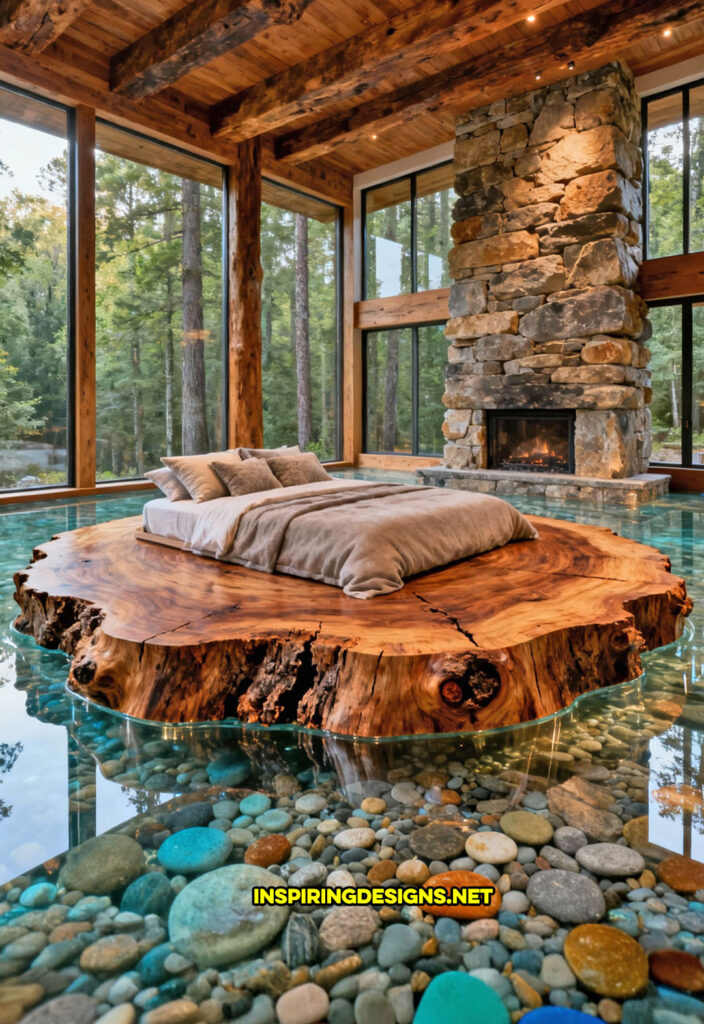
- A soft gradient that moves from pale sand near the bed to deeper aqua by the windows
- Rounded stones beneath a suspended slab of wood, creating the feeling of sleeping above a riverbed
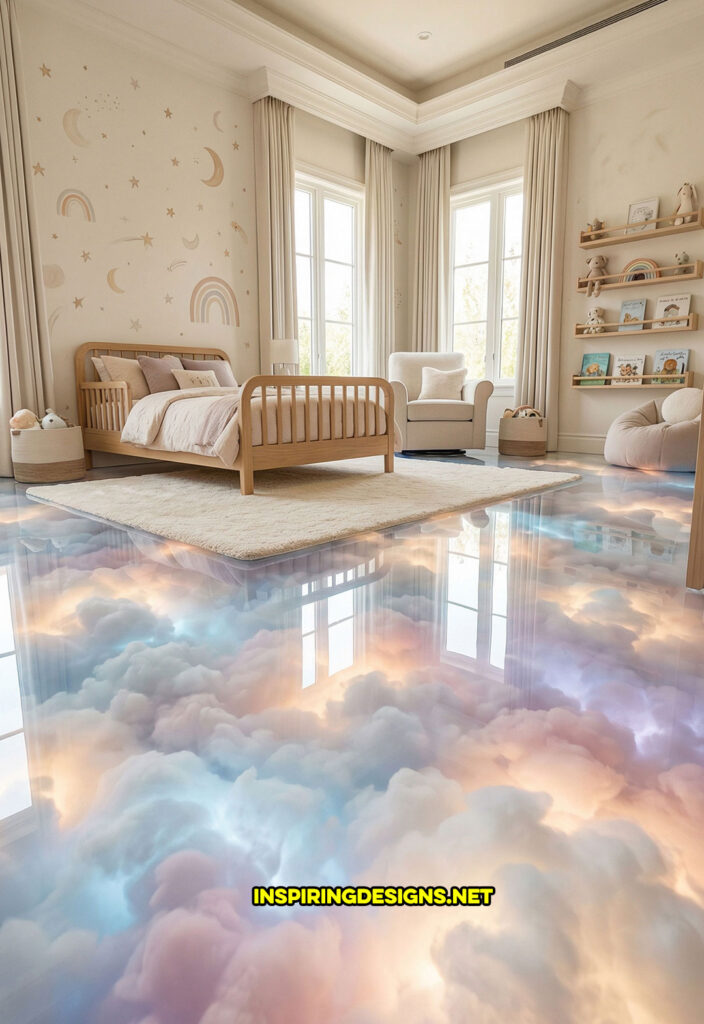
- A subtle cloud effect that rolls out from under a neutral rug, almost like morning fog hugging the floor
The trick here is restraint. Quiet color and natural layout keep the room restorative rather than busy.
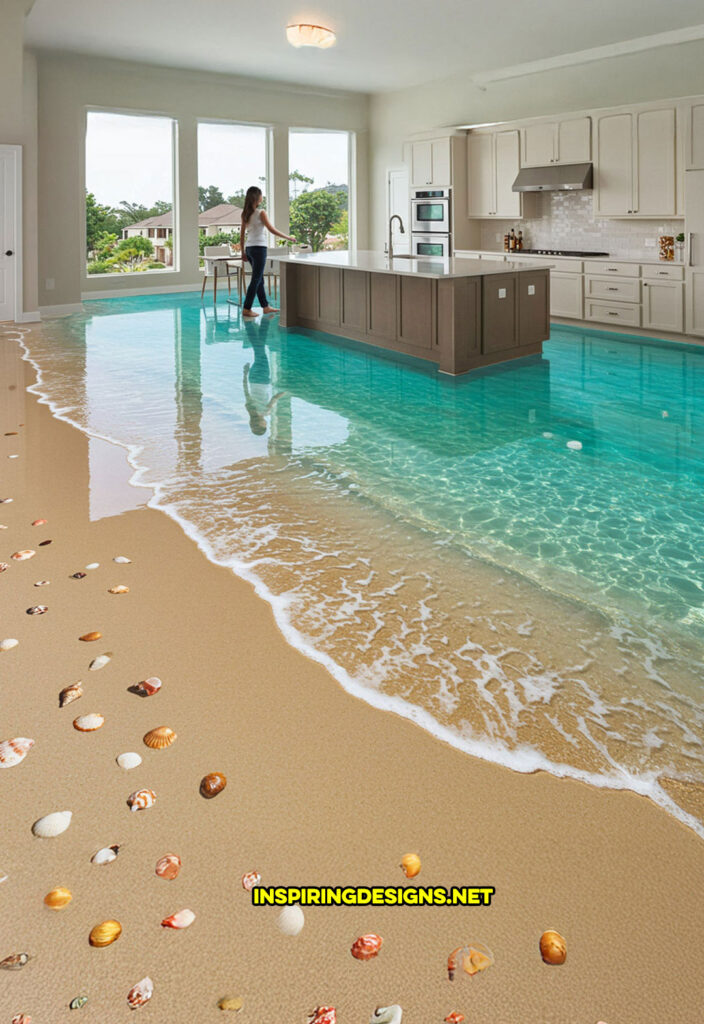
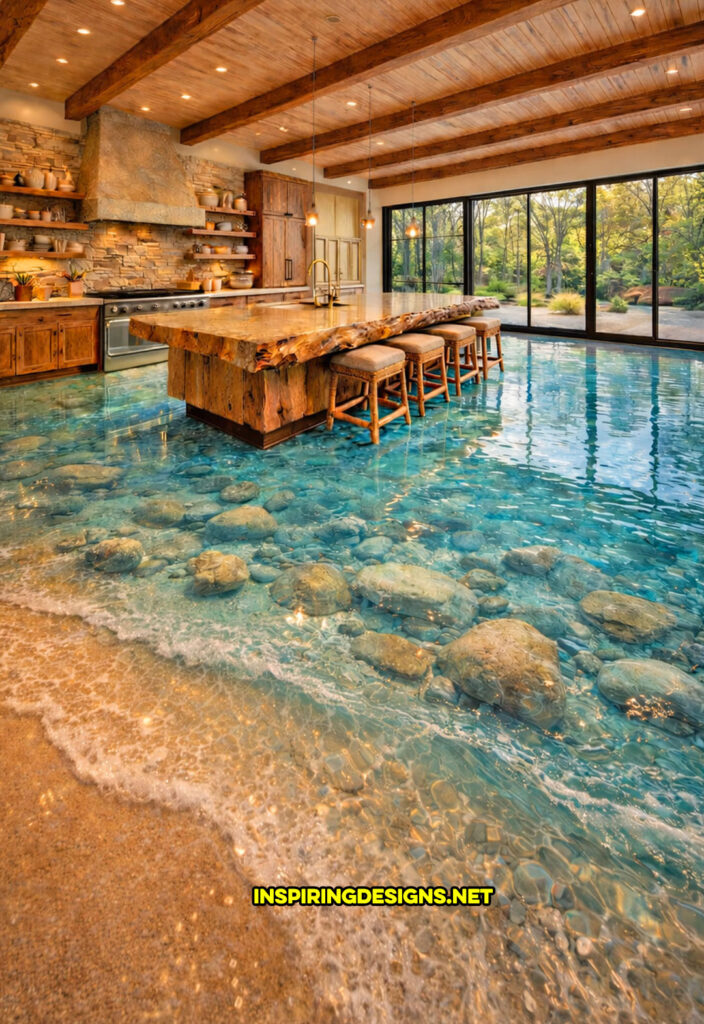
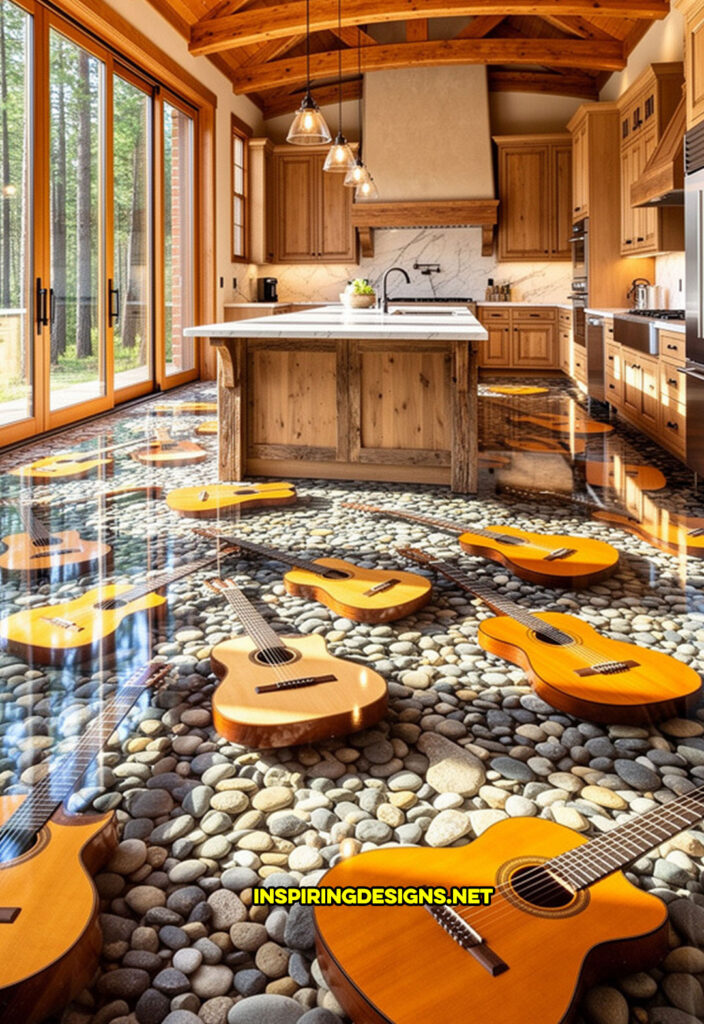
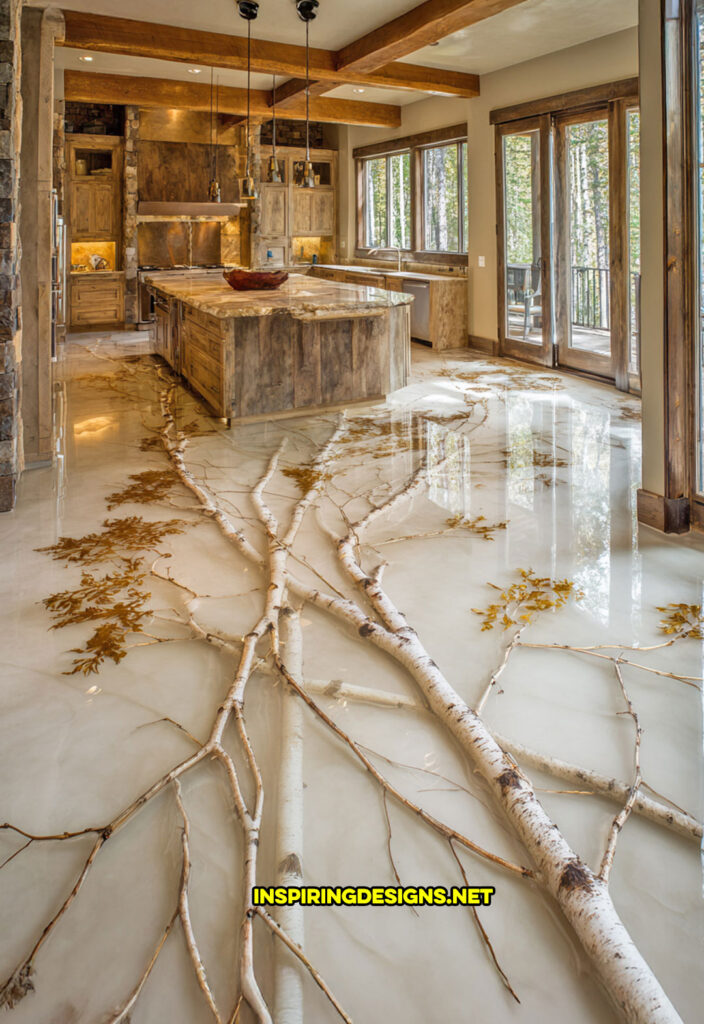
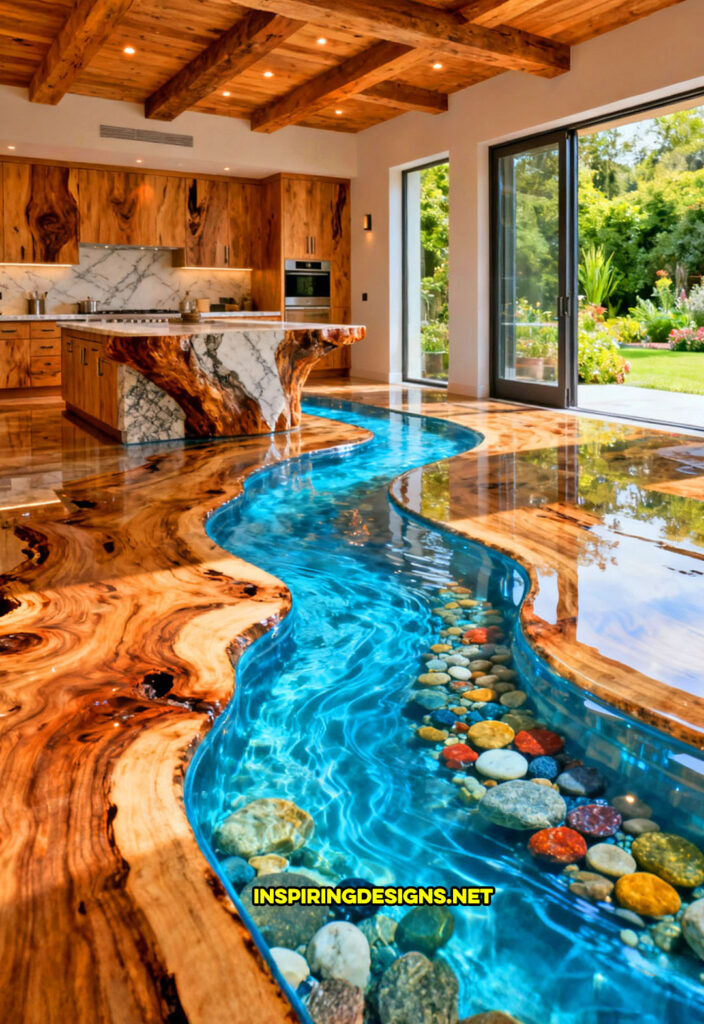
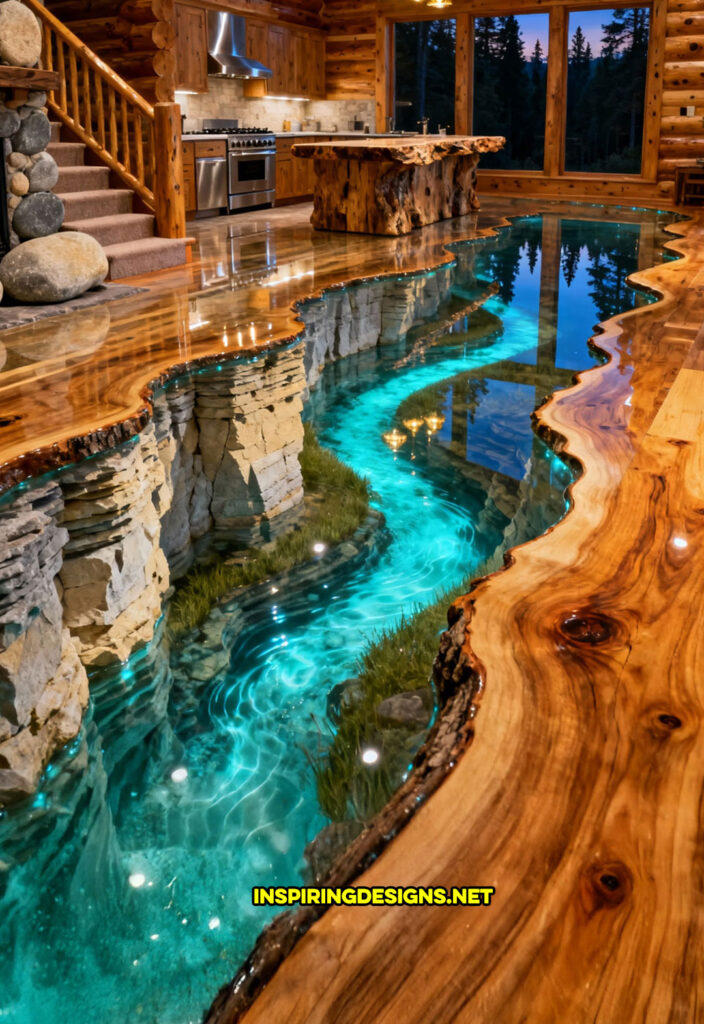
Kitchens and dining areas
Open modern kitchens love a seamless floor. High-gloss resin flows under islands and into dining zones without a change in material, which makes the whole space feel sculpted. Paired with wood, stone, and matte metals, a reflective surface stops feeling clinical and starts feeling intentional.
Some ideas:
- A gentle shoreline that laps around a hefty wood island
- Polished stones and sandy tones under a long dining table
- Subtle metallic swirls that catch pendant lighting and make the floor feel animated without stealing the show
Because the surface is non porous, spills and splashes clean easily, which is always welcome near the cooktop.
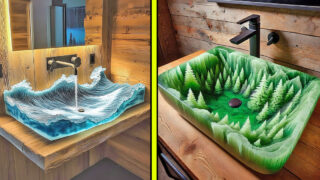
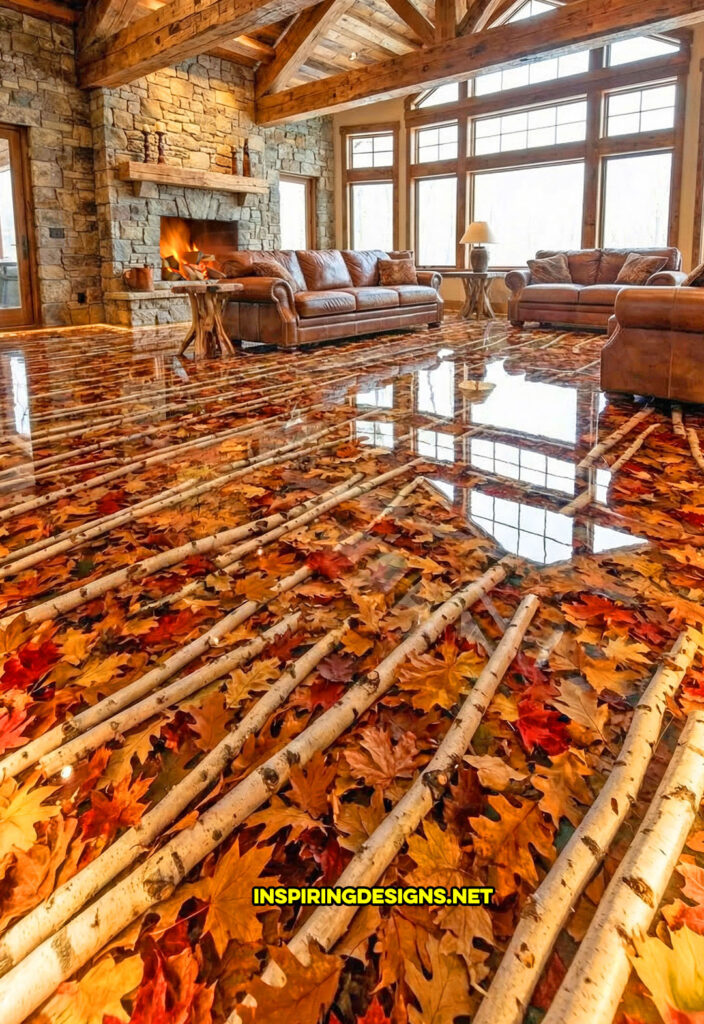
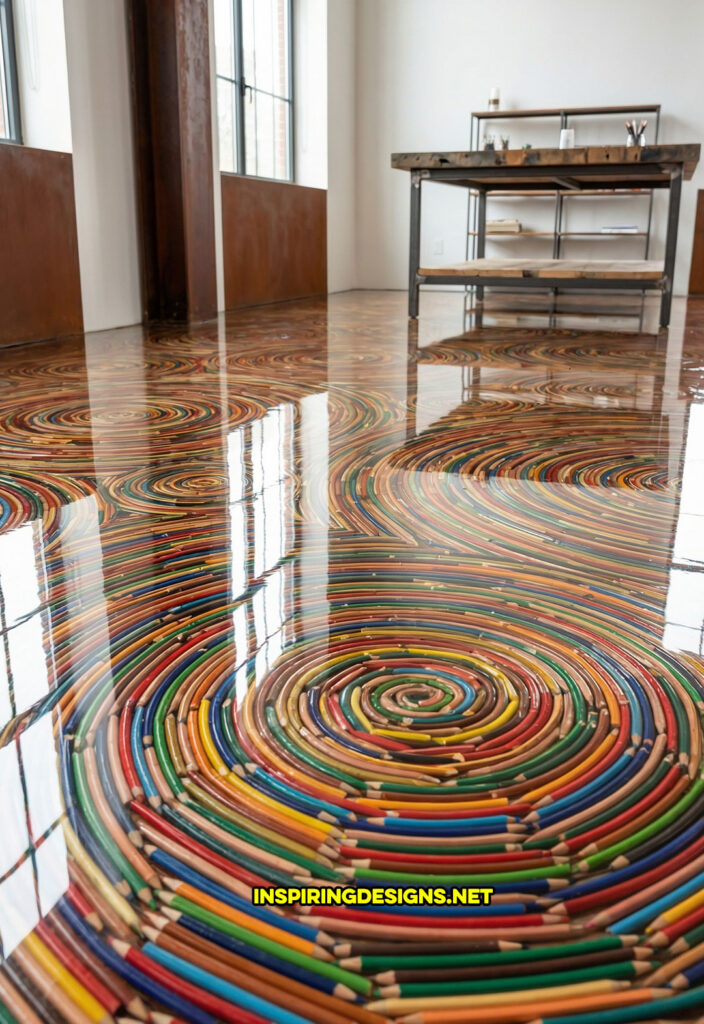
Entries, studios, and play spaces
These are the “why not” zones. A front entry can carry an autumn forest floor that sets the tone the moment guests step in. A creative studio can swirl with colored pencils or pigment ribbons that seem to move under a worktable. A kids’ playroom can float above a loose, dreamy cloudscape while still being incredibly simple to mop.
In themed rooms, personal collections can live safely under clear resin. Jerseys, posters, or small memorabilia pieces are flattened and encapsulated so the space feels curated instead of cluttered.
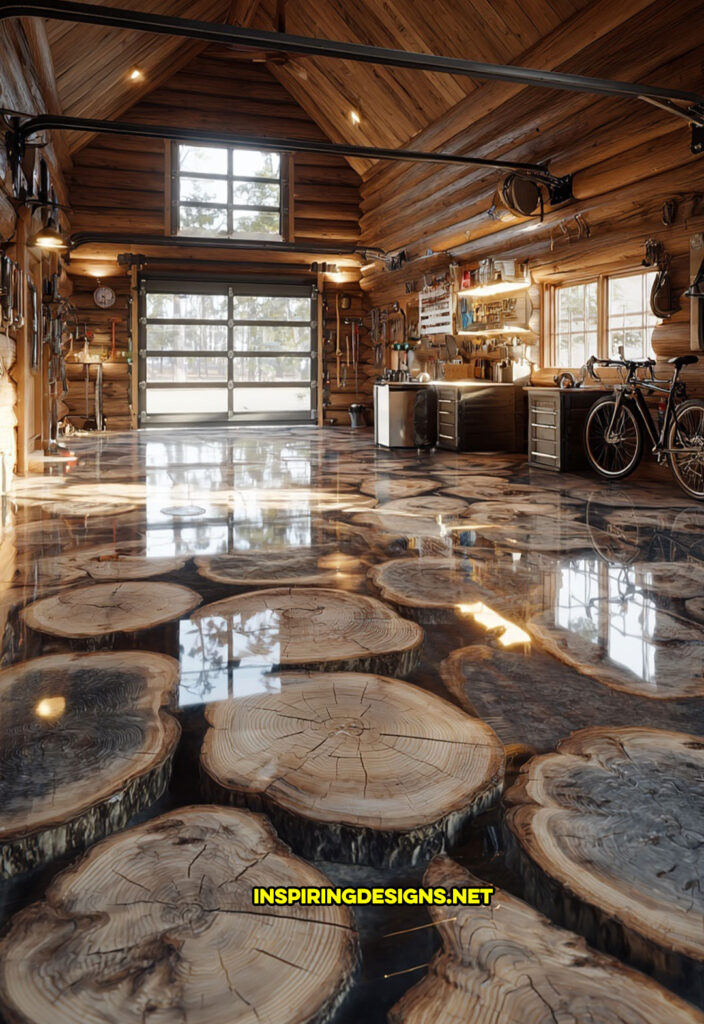
Garages
And, yes even garages can get an epoxy flooring treatment. Even better when massive wood slabs are involved!
Durability, care and daily life
For all the drama inside the resin, the surface is refreshingly easy to live with. It is extremely hard, non porous, and seamless. There are no grout joints to trap dirt and no boards to shift.
Daily care looks like this:
- Dust mop or microfiber a few times a week in busy rooms
- Clean with a neutral pH solution as needed
- Use mats at exterior doors to catch grit
- Stick felt pads under chair and sofa legs
- Glide heavy items on sliders instead of dragging them
Pets and kids are welcome. Claws that would terrorize a soft wood floor are much less of a concern here. Spills from art projects or dinner parties stay on the surface until wiped away.
For safety, traction can be tuned. Clear micro-grip additives can be blended into the final coat for baths, entries, or pool-adjacent rooms. They are practically invisible but give bare feet and shoes a bit more bite.
Sunlight is another consideration. Strong UV pouring through big windows will age any material over time. High quality resin systems use UV inhibitors to slow that process, and careful pigment choices help as well. Pair that with shades, films, or strategically placed trees and the floor keeps its clarity.
A quick comparison with traditional options
Sometimes it helps to see this surface alongside more familiar choices.
| Feature | Scenic Resin Floor | Hardwood | Tile |
|---|---|---|---|
| Seamless spans | Yes | No | No |
| Custom imagery and depth | Yes | Very limited | Very limited |
| Maintenance | Low | Moderate | Moderate |
| Grout or joints | None | Many | Many |
| Moisture resistance | Excellent | Fair | Very good |
| Design flexibility | Extremely high | Medium | Medium |
The idea is not that one material is “better” than all others. Instead, these floors behave more like built-in artwork. In rooms where you want an unforgettable experience, that makes a lot of sense.
Putting it all together
When you treat the ground plane as an art piece rather than an afterthought, the whole interior shifts. A room with a riverbed under glass or a clouded children’s floor feels more considered. Light plays differently. Furniture arrangements feel more deliberate. Guests stop and actually look down.
Planning one of these installations means balancing imagination with structure: understanding the build process, respecting cure times, thinking through cost drivers, and then giving the design room to breathe. Do that, and the floor quietly carries the story of the space every single day.
Lets check out some pros vs cons of having epoxy scene floors in your home!
| Pros of Scenic Epoxy Floors at Home | Cons / Tradeoffs to Consider |
|---|---|
| Immersive look and depth – creates dramatic water, wood, or stone effects you cannot get with planks or tile. | Higher upfront cost – typically more expensive per square foot than standard hardwood, LVP, or basic tile. |
| Seamless surface – no grout lines or board gaps, so the room reads as one clean, continuous plane. | Professional-only install – true 3D work is not DIY friendly; results depend heavily on the installer’s skill. |
| Very easy to clean – non porous and smooth, great for pets, kids, kitchens, and studios. | Cure time downtime – you may need to stay off the floor for several days while layers harden. |
| Highly customizable – every floor can be composed to fit the room, the view, and your personal story. | Harder to change later – unlike loose lay flooring, this is more permanent and costly to replace if your style shifts. |
| Works with many styles – pairs well with rustic timbers, modern glass, stone fireplaces, or minimal interiors. | Design risk – bold scenes or colors can feel too specific for future buyers if resale is a priority. |
| Durable and long lasting – resists stains, moisture, and most daily wear better than many traditional options. | Can show dust and smudges – high gloss makes footprints and crumbs more visible if you skip regular light cleaning. |
| Amplifies natural light – reflective surface bounces daylight and makes rooms feel larger and more open. | Glare and reflections – strong sunlight or intense overhead lighting can create reflections some people find distracting. |
| Works with radiant heat – conducts warmth evenly across the surface without joints or movement. | Needs UV-aware design – large sun-facing glass calls for UV-stable resin and possibly shades to protect long-term clarity. |
| Great for allergy sufferers – no fibers to hold dust, dander, or pollen; everything stays on the surface until wiped up. | Hard underfoot – the very strength that makes it durable also means it has less “give” than carpet or cork. |
| Turns rooms into conversation pieces – your living room, kitchen, or suite becomes a memorable showpiece. | Not ideal for every room – in spaces where you want surfaces to disappear completely, a feature floor might feel like “too much.” |
How to Create a Scenic Epoxy Floor at Home
Step 1: Assess and Prepare the Subfloor
Start by checking what you are working over: concrete or wood. The surface needs to be solid, dry, and as flat as possible. Any loose areas are repaired, cracks are filled, and high spots are ground down. On wood, extra stiffening or underlayment may be added so the floor does not flex too much under the cured resin.
Once repairs are done, everything is vacuumed very thoroughly. Dust and debris are the enemy of a clean finish. Walls, doors, cabinets, and adjacent floors are masked off so resin only goes where it is supposed to.
Step 2: Prime and Seal the Surface
A compatible primer is rolled or squeegeed over the clean subfloor. This helps the resin bond strongly and reduces the chance of air bubbles rising from the concrete or wood. In areas with higher moisture, a dedicated moisture barrier may be used before or along with the primer.
After this coat cures, the floor should look uniform and slightly textured. That texture gives the next layer something to grip, which is important for long term durability.
Step 3: Plan the Design and Layout
Before any clear resin goes down, the visual plan is mapped out. The installer walks through the space and pays attention to how you enter, where you stand, and where furniture will live. That helps decide where the strongest visual action should happen and where things should stay calmer.
If you are using real elements such as stones, wood slices, shells, or leaves, they are often laid out dry to test spacing and flow. From standing height, you can check whether clusters feel natural and whether key areas of the floor will stay visible once sofas, beds, or islands are in place.

Step 4: Pour the Base Layer and Place Elements
A base layer of resin, sometimes lightly tinted, is mixed and poured over the primed surface. It is guided into place with squeegees and rollers and allowed to self level. While this or the next layer is still workable, natural materials or painted effects can be introduced to create the scenic look.
Stones, wood slices, or botanicals are arranged in their final positions. Pigments or airbrushed details may be used to suggest water, depth, or soft motion. Everything is set so it will stay where it belongs once encapsulated.
Step 5: Build Depth with Additional Clear Layers
To create a three dimensional effect, more clear layers are added. Each layer is mixed precisely, poured, and allowed to flow out and level. After it cures, the installer can introduce additional details at a slightly higher level, then pour again.
This repeat process is how you achieve the illusion of depth while keeping the actual walking surface perfectly flat. Several medium layers are usually better than one extremely thick pour, both for appearance and for safe curing.
Step 6: Apply the Final Topcoat and Adjust Texture
When the visual build is complete and all layers have cured properly, a final topcoat is applied. This product is chosen for durability, UV resistance, and the desired gloss level. It is rolled or squeegeed evenly across the entire surface.
If the room needs more traction, a very fine clear grip additive can be mixed into this topcoat. That keeps the floor smooth to the eye but gives feet and shoes a bit more bite, especially in bathrooms, entries, or near exterior doors.
Step 7: Allow Full Cure and Move Back In
After the last coat, the floor needs time to harden. Light foot traffic is often allowed after a short period, but heavy furniture, rolling loads, and rugs are kept off until the system reaches full strength according to product guidelines.
Once that cure window passes, masking is removed, the surface is gently cleaned, and furniture is returned according to the original layout plan. The finished result is a single, seamless surface that reads as a calm, glossy window into a layered scene beneath your feet.